Fill & Sign Instructions
As an SIU faculty member, you have access to a variety of software applications to support teaching, research, and administrative responsibilities, including Adobe Acrobat Fill & Sign. To request software, follow the instructions provided in the Requesting Software guide available on the Office of Information Technology (OIT) website. The guide outlines the request process, eligibility requirements, and any necessary approvals. Depending on the software's licensing terms, applications may be installed on either an SIU-owned computer or, when permitted, a personal device used for university-related work. After your request is submitted, OIT will review it and provide installation instructions or additional information as needed.
Filling out the SIU Travel Expense Voucher is simple when you use Adobe Acrobat's Fill & Sign tool. This step-by-step guide walks you through opening the fillable PDF, entering your travel information, navigating between fields, adding your electronic signature, and saving your completed voucher for submission. Follow the illustrated instructions below to ensure your form is completed accurately and ready for processing. Reviewing these steps will help streamline the reimbursement process and reduce delays caused by incomplete or incorrectly completed forms.
Important Reminders
- The form must be typed. Do not handwrite.
- Attach all itemized receipts and required documentation.
- Review all entries for accuracy before submitting.
- Keep a copy for your records.
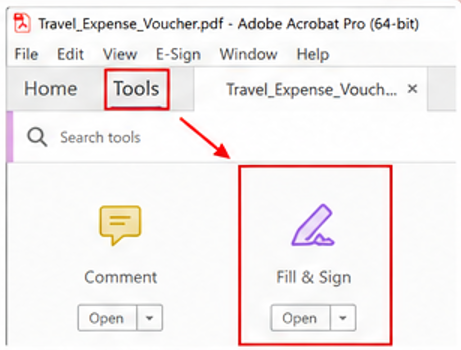
- Open the PDF in Adobe Acrobat
- Open the Travel Voucher PDF in Adobe Acrobat.
- The form is fillable. You can type directly in the blue fields.
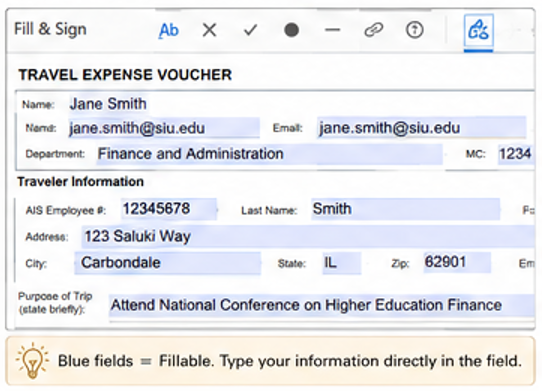
- Fill in the Form Fields
- Click in any blue field and type your information.
- Use the Tab key or click to move to the next field.
- Repeat for all applicable fields.
- Add additional rows on pages 3 (Itinerary and Justification) using the Blue "+" buttons as needed.

- Use Helpful Tools (Top Toolbar)
- Press the Tab key to move forward.
- Use the Previous Field (←) or Next Field (→) arrows to move between fields.
- Use the Save icon to save your progress.
- Use the Print icon to print the form.
- Use Zoom tools (- / +) to zoom in and out.
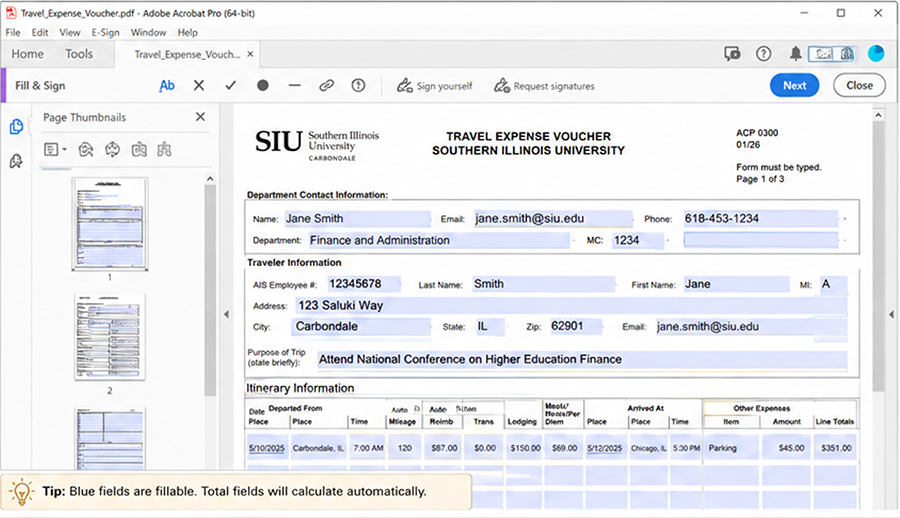
- Complete All Sections of the Form.
- Fill in all applicable fields on each page.
- Use the scroll bar or page thumbnails to navigate.
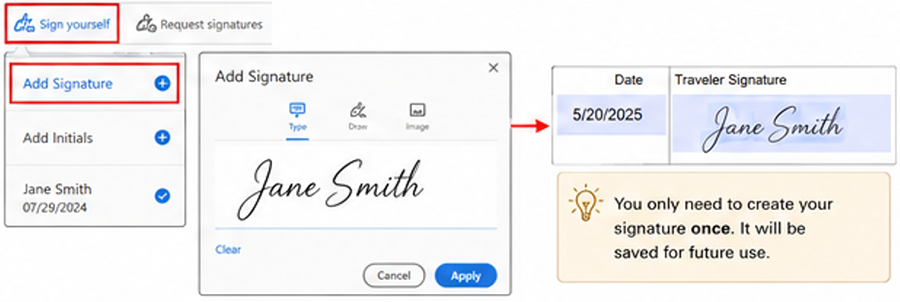
- Add Your Signature
- Click Sign yourself in the toolbar.
- Choose Add Signature > Add Signature.
- Type, draw, or upload your signature and click Apply.
- Click in the signature field on the form to apply.
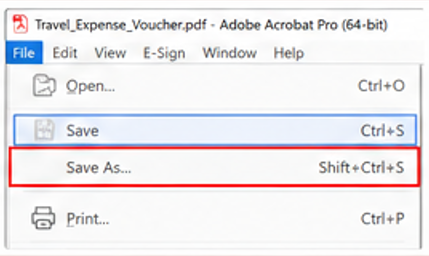
- Save and Submit
- Click File > Save As to save your completed form.
- Click File > Save As to save changes.
- Email the completed and signed voucher will all required documentation to your department contact.